In the world of motorcycles and leather, few things are as iconic as the biker vest. Now, imagine bringing that rugged, rebellious spirit into the digital realm.
That’s where biker vest SVGs come roaring onto the scene. Whether you’re a graphic designer, a custom apparel creator, or just a biker with a creative streak, mastering the art of biker vest SVGs can open up a whole new road of possibilities.
So, let’s kick-start this journey and dive deep into the world of vector-based biker fashion.
The Roar of the Road: Intro to Biker Vest SVGs
SVG stands for Scalable Vector Graphics, and it’s the perfect format for capturing the essence of biker culture in digital form.
Unlike pixel-based images that can get fuzzy when resized, SVGs stay crisp and clear no matter how big or small you make them.
This scalability is crucial when you’re dealing with intricate designs like patches, studs, and zippers on a biker vest.
The allure of biker vests isn’t just about fashion – it’s about identity. Each patch, pin, and stud tells a story. By creating biker vest SVGs, you’re not just making a graphic;
you’re crafting a digital representation of a lifestyle. These vector images can be used for everything from website design to custom printing, allowing the biker aesthetic to rev its engine across various digital platforms.
“A biker’s vest is like a second skin – it’s who we are. Bringing that to life digitally? That’s next-level cool.” – Jake “Throttle” Thompson, veteran biker and digital artist
But why SVG for biker vests specifically? Let’s break it down:
- Precision: SVGs allow for incredibly detailed designs, perfect for replicating intricate patch work.
- Scalability: From tiny website icons to massive billboards, your design stays sharp.
- Editability: Easy to modify colors, sizes, and elements without starting from scratch.
- Interactivity: SVGs can be animated and interactive when used on websites.
- Small file size: Especially important for web use, keeping sites fast and responsive.
As we cruise through this guide, you’ll learn how to harness these benefits to create stunning biker vest designs that look great whether they’re on a computer screen or the back of a real leather vest.
Crafting Your Digital Leather: Essential Elements
When you’re creating a biker vest SVG, you need to nail the basics. Think of it as building your bike from the ground up – you start with the frame and add components one by one. Here’s a breakdown of the key elements:
- Vest structure: Start with a simple V-shape for the front, connected to rectangular back piece.
- Collar: A folded-down collar adds authenticity.
- Pockets: Usually two on the front, sometimes with flaps.
- Zipper: Central or slightly off-center, running from bottom to collar.
- Seams: Don’t forget these – they add realism to your design.
- Arm holes: Shape these carefully for a realistic fit.
- Bottom hem: Often slightly curved for a better fit around the waist.
The trick is to create these elements as separate layers in your SVG. This allows for easy customization later on. For instance, you might want to change the color of the vest or add wear and tear effects.
Here’s a quick table of common dimensions for a men’s biker vest SVG:
| Element | Typical Dimensions (relative to vest height) |
| Vest Height | 100% (base measurement) |
| Vest Width | 80-90% of height |
| Collar Height | 10-15% of vest height |
| Pocket Width | 20-25% of vest width |
| Zipper Length | 90-95% of vest height |
| Arm Hole Depth | 40-45% of vest height |
| Bottom Hem Curve | 5-10% of vest width |
Remember, these are just guidelines. In the world of bikers, customization is key!
When creating your biker vest SVG, consider the following tips:
- Use gradients to create the illusion of light and shadow on the leather.
- Add subtle noise textures to simulate the grain of real leather.
- Pay attention to stitch lines – they’re small details that add a lot of realism.
- Don’t forget about the inside of the vest – a peek of lining can add depth to your design.
Patches of Pride: Customizing Your Digital Cut
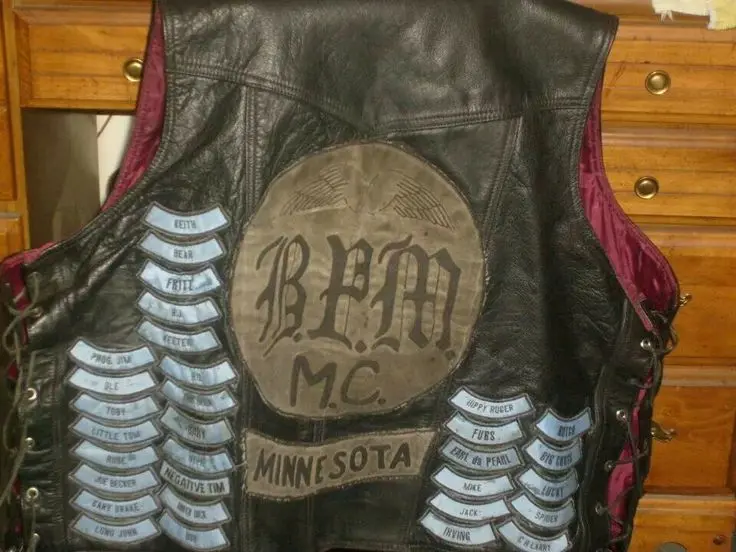
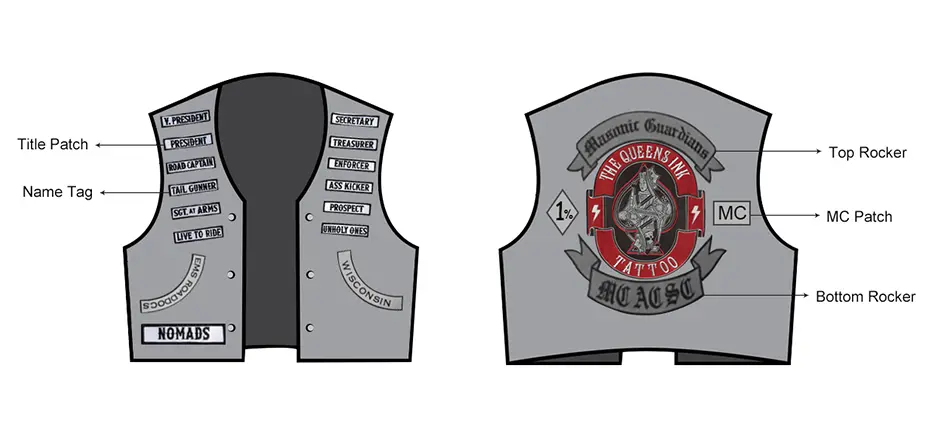
Now we’re getting to the good stuff – the patches. In biker culture, patches aren’t just decorations; they’re badges of honor, statements of allegiance, and personal expressions. When creating biker vest SVGs, understanding the significance of these patches is crucial.
Here’s a list of common biker patches and their meanings:
- 1%er: Symbolizes outlaw motorcycle clubs
- DILLIGAF: Stands for “Do I Look Like I Give A F***”
- FTW: “Forever Two Wheels” or a more rebellious interpretation
- MC: Motorcycle Club
- Rockers: Curved patches usually indicating club name and location
- Wing & Wheel: Often associated with Harley-Davidson enthusiasts
- POW/MIA: Remembrance for prisoners of war and those missing in action
- Eagle: Symbolizes freedom and American pride
- Skull: Represents facing mortality or a “live free or die” attitude
When adding these to your SVG, consider the placement. Back patches are typically the largest and most prominent, while smaller patches and pins scatter across the front.
To add a weathered look to your patches, try these techniques:
- Use gradient overlays to simulate fading
- Add subtle noise textures
- Incorporate slight color variations to mimic thread wear
- Use the roughen effect in your SVG software to create frayed edges
- Add small imperfections or “chips” in the design to simulate wear and tear
Remember, the key to creating authentic-looking biker vest SVGs is in the details. Don’t be afraid to zoom in and work on the minutiae – it’s these small touches that will make your design stand out.
From Pixels to Pavement: Practical Applications
So you’ve created an awesome biker vest SVG – now what? The applications are as wide as the open road:
- Print-on-demand: Upload your designs to platforms like Printful or Redbubble to create custom biker gear.
- Digital mockups: Use your SVGs to create realistic mockups for custom vest designs.
- Website design: Incorporate biker vest elements into motorcycle club websites or biker-themed online stores.
- App icons: Create unique icons for biker-related mobile apps.
- Marketing materials: Design eye-catching flyers or social media graphics for biker events.
- Video game assets: Provide custom designs for motorcycle-themed video games.
- Augmented reality: Create AR filters that let users “try on” different vest designs.
- Embroidery patterns: Convert your SVGs into patterns for actual vest embroidery.
- Tattoo designs: Bikers often get tattoos of their club insignia – your SVGs could be the blueprint.
- Educational materials: Use your designs in materials teaching about biker culture and history.
Case Study: The Steel Stallions MC The Steel Stallions, a motorcycle club in Arizona, used biker vest SVGs to revamp their online presence.
They created a digital version of their club vest, complete with their signature stallion back patch. This SVG was used across their website, social media, and even animated for video intros.
The result? A 200% increase in merchandise sales and a 150% boost in new member applications.
“The digital vest became our calling card,” says Mike “Ironhide” Johnson, president of the Steel Stallions. “It let prospects see exactly what they were signing up for, and it gave our existing members a sense of pride to see our colors displayed so prominently online.”
This case study highlights the power of biker vest SVGs in branding and community building. By creating a high-quality digital representation of their vest, the Steel Stallions were able to extend their club’s presence beyond the physical world, attracting new members and increasing engagement with existing ones.
Tools of the Trade: Software for SVG Creation
You don’t need a garage full of tools to create biker vest SVGs – just the right software. Here’s a rundown of popular options:
Free Options:
- Inkscape: Powerful, open-source vector graphics software
- Vectr: Browser-based vector editor, great for beginners
- SVG-edit: Another browser-based option, lightweight and easy to use
- Boxy SVG: A simple yet capable SVG editor that runs in your browser
Paid Options:
- Adobe Illustrator: The industry standard, packed with features
- Affinity Designer: A more affordable alternative to Illustrator
- Sketch: Popular among UI/UX designers, Mac-only
- CorelDRAW: A comprehensive graphic design suite with strong SVG support
When choosing software for biker vest SVGs, look for these key features:
- Layering capabilities
- Pen tool for precise curves
- Texture and pattern creation
- Export options (especially SVG and PNG)
- Path manipulation tools
- Gradient mesh for complex color effects
- Symbol libraries for repeated elements like studs or buttons
Each software has its strengths and learning curves. Inkscape, for instance, is free and powerful but can be intimidating for beginners. Adobe Illustrator, while expensive, offers the most comprehensive set of tools and integrates well with other design software.
For those just starting out, Vectr or SVG-edit can be great options. They’re intuitive and run in your browser, so there’s no need to install anything. As you grow more comfortable with SVG creation, you might want to graduate to more powerful tools like Inkscape or Affinity Designer.
Remember, the best tool is the one you’re comfortable using. Don’t be afraid to try out different options to find what works best for you.
The Devil’s in the Details: Advanced SVG Techniques
Ready to take your biker vest SVGs to the next level? Let’s dive into some advanced techniques:
Layering for Realism
- Start with a base leather texture
- Add a shadow layer beneath patches and studs
- Use highlight layers to create a 3D effect on zippers and buttons
- Incorporate a subtle grain overlay to mimic real leather
- Use clipping masks to create the illusion of patches sewn onto the vest
Animating Your Vest Design
Yes, you read that right – you can animate SVGs! Here are some ideas:
- Make patches appear one by one
- Animate the zipper opening and closing
- Create a shimmer effect on metallic elements
- Add a subtle “breathing” effect to make the vest seem more alive
- Create an interactive vest where elements respond to mouse hover
Creating Complex Textures
To really make your biker vest SVG pop, you’ll want to master the art of creating complex textures. Here are some techniques:
- Leather grain: Use a combination of noise filters and displacement maps to create realistic leather textures.
- Weathered effects: Overlay grunge textures and use blend modes to create a worn, weathered look.
- Stitching: Create custom brushes to easily add realistic stitching to your vest design.
- Metallic effects: Use gradient meshes to create complex metallic surfaces for studs, zippers, and other hardware.
Remember, the key to great textures is subtlety. It’s easy to go overboard, but the most realistic textures are often the ones you barely notice.
Ride or Die: Best Practices for Biker Vest SVGs
Creating awesome biker vest SVGs isn’t just about artistic skill – it’s also about smart file management and optimization. Here are some best practices to keep your digital designs as sharp as a freshly waxed chopper:
- Name your layers logically: “Back_Patch”, “Left_Pocket”, “Zipper”, etc.
- Group related elements: Keep all studs in one group, all patches in another.
- Use consistent color palettes: Save your commonly used colors for easy access.
- Optimize for web: Use tools like SVGOMG to reduce file size without losing quality.
- Version control: Save iterations of your design. You never know when you might want to backtrack.
- Use symbols for repeated elements: Create a symbol for studs or buttons to easily reuse them.
- Keep your paths clean: Regularly simplify and clean up your paths to reduce file size and improve rendering.
- Use semantic IDs and classes: This makes it easier to style and animate your SVG with CSS.
- Test across browsers: SVG support can vary, so test your designs in different browsers.
- Document your process: Keep notes on your techniques for future reference.
Optimizing SVGs for Web and Print
| Consideration | For Web | For Print |
| Color Mode | RGB | CMYK |
| Resolution | 72 DPI | 300 DPI minimum |
| File Size | Aim for <100KB | Higher is okay |
| Fonts | Convert to paths | Embed or outline |
| Compression | Use SVGO or similar | Avoid lossy compression |
| Metadata | Remove unnecessary data | Keep copyright info |
| Responsiveness | Use viewBox for scaling | Set fixed dimensions |
When optimizing for web, consider using SVG sprite sheets for collections of small, frequently used graphics. This can significantly reduce HTTP requests and improve load times.
For print, remember that some effects (like filters) may not translate well to physical media. Always do a test print to ensure your design looks as good on leather as it does on screen.
Leather and Code: Integrating SVGs into Biker Websites
Biker vest SVGs aren’t just static images – they can become interactive elements of a website. Here’s how:
- Hover effects: Make patches light up or change color on mouse-over.
- Clickable areas: Turn different parts of the vest into navigation elements.
- Parallax scrolling: Create depth by making vest elements move at different speeds.
- Customizer tool: Allow users to drag and drop patches onto a base vest design.
- Animated transitions: Use morphing animations between different vest designs.
Remember, large SVGs can impact page load times. To mitigate this:
- Use lazy loading for SVGs further down the page
- Consider using SVG sprites for repeated elements
- Compress your SVGs using tools like SVGO
- Use CSS animations instead of SMIL when possible for better performance
When integrating SVGs into your biker website, think about the overall user experience. How can your vest design enhance navigation, tell a story, or showcase the club’s identity? With thoughtful integration, your biker vest SVG can become a central part of your site’s design and functionality.
The Open Road: Sharing and Selling Your Designs
Created an killer biker vest SVG? Don’t keep it locked up in your digital garage! Here’s how to share and potentially profit from your creations:
- Online marketplaces: Sites like Creative Market or Etsy are great for selling SVG designs.
- Stock vector sites: Consider uploading to Shutterstock or Adobe Stock.
- Biker forums: Share your designs (watermarked) to get feedback and build a following.
- Social media: Instagram and Pinterest are visual platforms perfect for showcasing your work.
When it comes to licensing, you’ve got options:
- Royalty-free: One-time purchase, unlimited use
- Rights-managed: Usage restrictions based on factors like time, location, or medium
- Creative Commons: Various levels of free use, with attribution
“Sharing your biker vest SVGs isn’t just about making money – it’s about contributing to the culture. Every design tells a story, and that story deserves to be heard.” – Maria “Stitch” Rodriguez, custom patch designer
Kickstart Your Creativity: Biker Vest SVG Tutorial
Ready to create your first biker vest SVG? Let’s walk through a basic design:
- Create the base: Draw a V-shaped front and rectangular back.
- Add details: Sketch in pockets, collar, and zipper.
- Texture time: Apply a leather texture to the base.
- Patch it up: Design a simple back patch – maybe a skull or an eagle.
- Stud it: Add some studs along the collar and pockets.
- Fine-tune: Adjust colors, add shadows for depth.
- Export: Save as an SVG, making sure all fonts are converted to paths.
Pro tip: Start with a simple design and gradually add complexity. It’s easier to build up than to simplify later.
Chrome and Pixels: The Future of Digital Biker Art
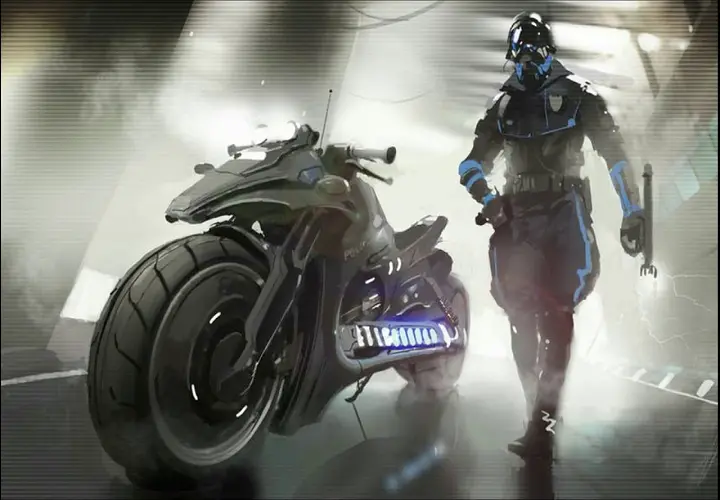
The world of biker vest SVGs is constantly evolving. Here are some trends to watch:
- AR integration: Imagine pointing your phone at a plain vest and seeing it come alive with virtual patches.
- 3D modeling: Creating 3D SVG-based vest models for even more realistic digital representations.
- AI-assisted design: Using machine learning to generate unique patch designs based on input parameters.
- Blockchain authentication: Using NFTs to create verifiable, one-of-a-kind digital biker vests.
As technology advances, the line between physical and digital biker culture will continue to blur. Biker vest SVGs are more than just digital art – they’re a bridge between traditional biker culture and the digital frontier.
In conclusion, mastering biker vest SVGs opens up a world of creative possibilities. Whether you’re designing for the web, creating custom merch, or just expressing your love for biker culture, these digital designs carry the spirit of the open road into the digital age.
So fire up your preferred SVG software, let your creativity run wild, and remember – in both biking and design, it’s not just the destination that matters, but the journey itself. Keep riding, keep creating, and let your biker vest SVGs tell your story to the world.
FAQ:
Q: What’s the best software for creating biker vest SVGs?
A: The “best” software depends on your skill level and needs. For beginners, free options like Inkscape or browser-based tools like Vectr are great starting points. They offer essential features without overwhelming you with complex tools. For professionals or those seeking more advanced capabilities, Adobe Illustrator is the industry standard. It provides a comprehensive suite of tools for creating detailed, high-quality SVGs. Affinity Designer is a popular, more affordable alternative that offers similar functionality. Ultimately, the best software is the one you’re most comfortable using. Try a few options to see which interface and feature set work best for your workflow and design style.
Q: How do I ensure my biker vest SVG looks good when printed?
A: To ensure your biker vest SVG prints well, start by designing at the correct size and resolution. Use CMYK color mode for accurate color reproduction in print. Convert all text to outlines to avoid font issues. When exporting, maintain a high resolution (at least 300 DPI) and avoid lossy compression. Test your design by printing on different materials to see how textures and colors translate. Remember that some digital effects, like gradients or shadows, may not print as smoothly as they appear on screen. Adjust these elements for optimal print results. Always do a test print before finalizing your design or sending it for mass production.
Q: Can I animate my biker vest SVG for web use?
A: Yes, you can animate your biker vest SVG for web use! There are several methods to achieve this. CSS animations are a popular choice for simple animations like color changes, rotations, or transitions. For more complex animations, you can use JavaScript libraries like Green Sock (GSAP) or Snap .svg. These offer powerful tools for creating intricate animations and interactions. SVG also has its own animation element, SMIL (Synchronized Multimedia Integration Language), though it’s less widely supported. When animating, consider performance implications, especially on mobile devices. Keep animations subtle and purposeful to enhance user experience without being distracting.
Q: How can I protect my biker vest SVG designs from being copied?
A: While it’s challenging to completely prevent copying of digital designs, there are steps you can take to protect your biker vest SVGs. First, always include copyright information in your SVG file’s metadata. Watermark preview images of your designs when sharing online. Use SVG encryption tools to make your code harder to read and copy. Consider selling your designs through reputable marketplaces that offer built-in protections. Register your designs with copyright offices for legal protection. Offer only low-resolution or partially obscured versions for preview, providing the full-quality file only after purchase. Remember, building a strong brand and reputation can be more valuable than trying to prevent all copying.
Q: How do I create realistic leather textures in my biker vest SVGs?
A: Creating realistic leather textures in SVGs requires a combination of techniques. Start by using a base color that mimics real leather. Add subtle gradients to create depth and simulate light reflection. Incorporate noise textures to replicate the grainy surface of leather . you can create these using filters in your SVG software. Use opacity masks to add wear patterns and variations in color. For stitching, create custom brushes or use repeated path elements. Experiment with different blend modes to achieve a more authentic look. Remember, the key to realism is subtlety – don’t overdo the effects. Study real leather textures and try to replicate the small imperfections and variations that make leather look genuine.

With over 9 years of dedicated experience in the automotive industry, I am passionate about all things automotive. My journey began with a deep curiosity for automobiles, which led me to delve deeper into their mechanics, technology and trends. My expertise spans various aspects of the automotive world, from the latest electric vehicles to classic car restoration techniques. Through my articles, I aim to share my knowledge and insights, helping readers stay informed and inspired in the fast-paced world of the automobile.
