In recent years, Wrap a Car has exploded in popularity, offering car enthusiasts and everyday drivers alike a chance to dramatically transform their vehicle’s appearance without the permanence of a new paint job.
But as the trend grows, so does a pressing question: Is it hard to wrap a car yourself? This comprehensive guide dives deep into the world of DIY vehicle wrapping, exploring every aspect from the basics to advanced techniques, challenges, and rewards of tackling this ambitious project on your own.
Understanding the Basics of Wrap a Car
Before we roll up our sleeves and get into the nitty gritty of DIY car wraps, let’s establish a solid foundation of what car wrapping entails and why it’s become such a popular choice for vehicle customization.
What is car wrapping?
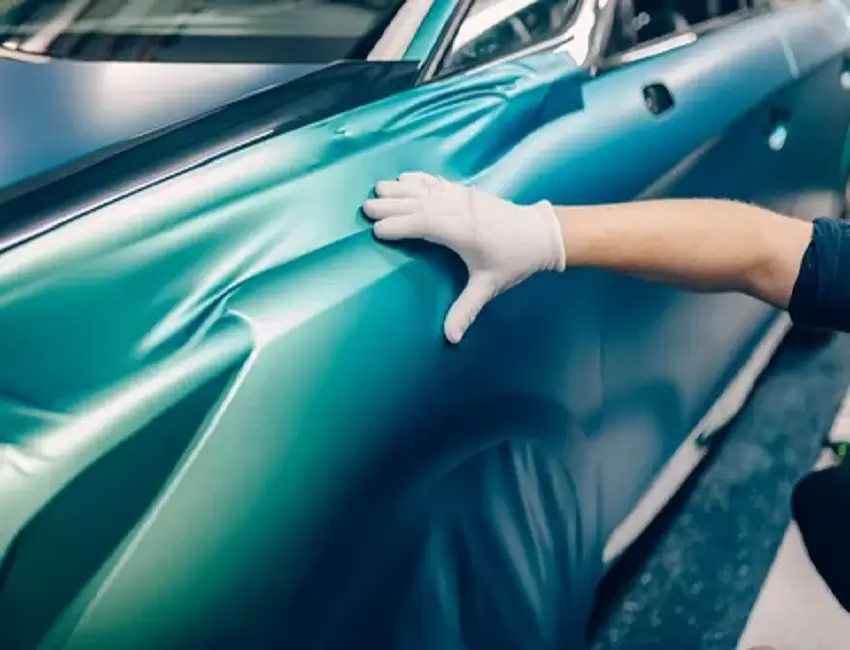
Car wrapping is the process of applying large vinyl sheets to the exterior of a vehicle, effectively changing its color and finish. This method allows for dramatic transformations without altering the original paint, making it an attractive option for those seeking a temporary change or protection for their car’s factory finish.
The vinyl application process involves carefully laying, stretching, and adhering these specialized films over every contour of the vehicle’s body. When done correctly, the result is a seamless, paint-like finish that can completely alter the car’s appearance.
Types of vinyl wraps
The world of vinyl wraps is vast and varied, offering an array of options to suit every taste and style:
- Matte finishes: Perfect for a sleek, understated look
- Glossy wraps: Mimic the shine of a fresh paint job
- Metallic and chrome effects: For those who want to stand out
- Carbon fiber looks: Popular among sports car enthusiasts
- Color-shifting vinyls: Change color depending on viewing angle
- Textured wraps: Add unique tactile elements to your vehicle
Each type of wrap comes with its own application challenges and aesthetic benefits, allowing for truly customized results.
Cost comparison: DIY vs. Professional
One of the primary motivations for attempting a DIY car wrap is the potential cost savings. Let’s break down the numbers to see how DIY compares to professional installation:
| Aspect | DIY Cost Range | Professional Cost Range |
|---|---|---|
| Materials | $500 – $1,000 | Included in service |
| Tools | $100 – $300 | N/A |
| Labor | Your time (40-80 hours) | $2,000 – $5,000+ |
| Total | $600 – $1,300 | $2,000 – $5,000+ |
While the DIY route can lead to significant savings, it’s crucial to weigh these against the time investment and potential for mistakes. Remember, your time is valuable, and the learning curve can be steep.
The Challenges of DIY Car Wrapping
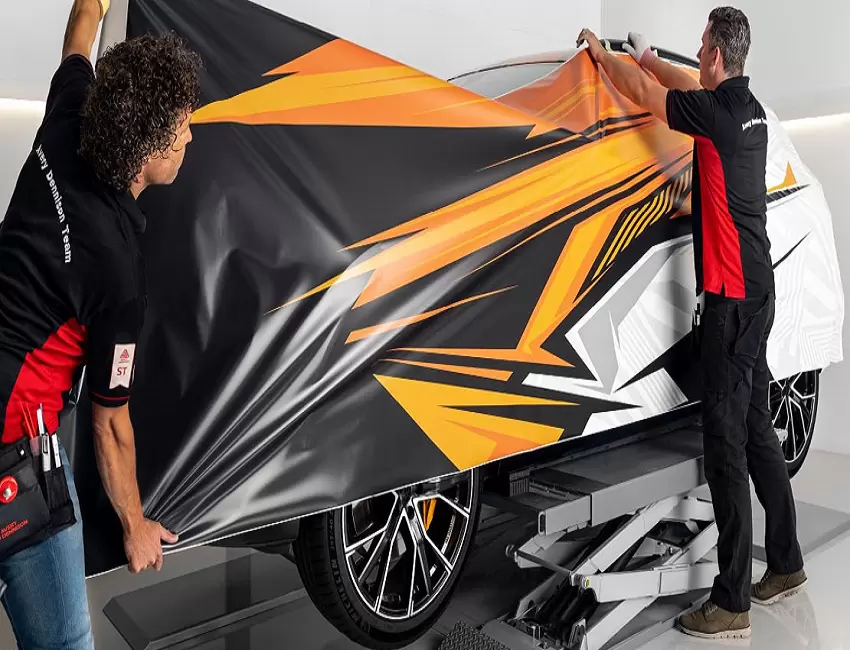
Vinyl application is no small feat, especially for beginners. Let’s explore the key challenges you’ll face when attempting to wrap your car yourself:
Surface preparation: More than just cleaning
A successful wrap starts with impeccable surface preparation. This step is crucial and often underestimated by DIY enthusiasts. Here’s what it involves:
- Thorough washing and degreasing of the entire vehicle
- Clay bar treatment to remove embedded contaminants
- Addressing any rust, dents, or damage (these will show through the wrap)
- Removing trim, badges, and other accessories for a cleaner application
“Prep is 80% of the job. If you skimp on preparation, no amount of skill can save your wrap.” – Mike, Professional Wrapper with 15 years of experience
This step alone can take several hours, but it’s absolutely essential for a high-quality finish.
Precision planning: Measuring and cutting
Accurate measurements and precise cutting are crucial for a seamless finish. You’ll need to:
- Create templates for complex areas like bumpers and mirrors
- Account for stretch and shrinkage of the vinyl during application
- Plan for pattern matching across panels to maintain a cohesive look
- Calculate the amount of vinyl needed with extra for mistakes and difficult areas
This planning stage is where many DIYers underestimate the complexity of the task. It’s not just about covering the car; it’s about doing so in a way that looks professional and seamless.
Tool mastery: Beyond the basics
A successful DIY car wrap requires more than just a squeegee and a steady hand. Essential tools include:
- Heat guns for shaping vinyl around curves and complex contours
- Precision cutting tools for trimming excess vinyl
- Specialized squeegees for different applications (edges, flat surfaces, curves)
- Infrared thermometers to monitor surface temperatures during application
Learning to use these tools effectively takes practice and patience. Each has its own technique and purpose in the wrapping process.
Environmental control: Temperature and dust
The ideal conditions for vinyl installation are more specific than you might think:
- Temperature: 70-80°F (21-27°C)
- Humidity: 40-60%
- Dust-free environment
Achieving these conditions can be challenging outside of a professional setting. Temperature affects the vinyl’s pliability, while dust can create imperfections in the finish. Many DIYers struggle to create an ideal environment, leading to frustration and subpar results.
Contour conundrums: Navigating curves and edges
Modern vehicles are designed with complex curves and sharp edges, making vinyl application particularly challenging. Areas like bumpers, mirrors, door handles and body lines require advanced techniques to avoid lifting, bubbling, or tearing.
Mastering these techniques often separates amateur wraps from professional-looking jobs. It requires a deep understanding of how vinyl behaves when stretched and heated, as well as the patience to work slowly and methodically.
Time investment: Patience is key
A full vehicle wrapping project can take anywhere from 2-5 days for an experienced professional. As a DIY enthusiast, you should expect to spend significantly more time, possibly up to a week or more for your first attempt.
This time investment includes:
- Research and preparation
- Surface cleaning and preparation
- Careful application of vinyl
- Troubleshooting and fixing mistakes
- Final trimming and finishing touches
Rushing any part of this process can lead to disappointing results and the need to start over, costing both time and materials.
Essential Steps for a Successful DIY Wrap
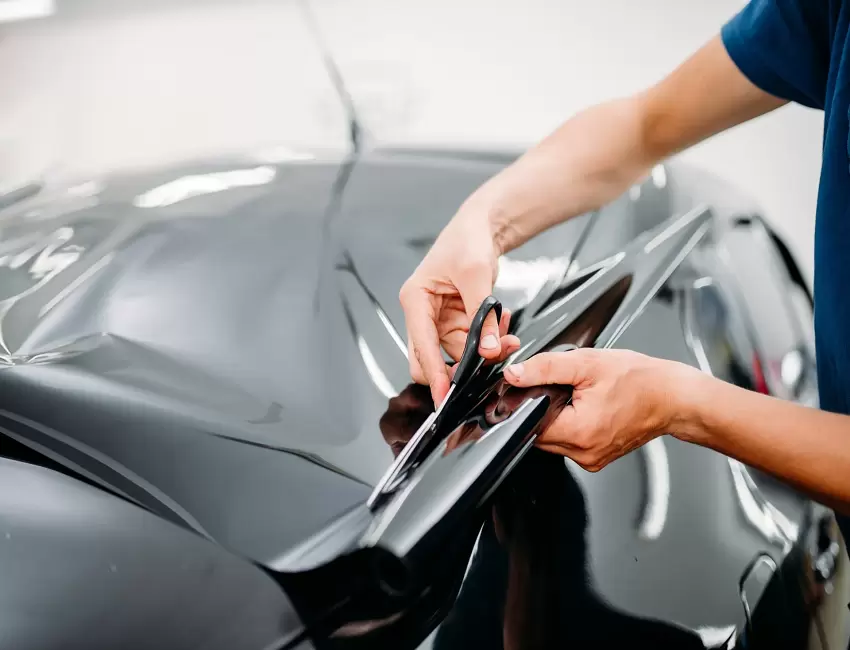
To increase your chances of success, follow these crucial steps in your DIY car wrap journey:
- Thorough vehicle inspection
- Document existing damage with photos
- Identify problem areas that may affect the wrap (rust, dents, deep scratches)
- Plan how to address or work around these issues
- Selecting the right vinyl
- Choose a reputable brand known for quality and ease of use
- Consider ease of application for beginners (some vinyls are more forgiving)
- Ensure sufficient quantity (typically 50-75 sq ft for a standard car, more for larger vehicles)
- Factor in extra material for mistakes and difficult areas
- Gathering proper tools
- Invest in quality tools to improve results
- Don’t skimp on essentials like heat guns and cutting tools
- Consider renting specialized tools if budget is a concern
- Creating a wrapping strategy
- Plan your approach panel by panel
- Decide on seam placement for minimal visibility
- Create a workflow that minimizes the risk of damaging already wrapped sections
- Surface preparation techniques
- Wash and clay bar the entire vehicle
- Use isopropyl alcohol for final cleaning to remove any residues
- Remove or mask off trim and accessories
- Repair any damage that could affect the wrap’s appearance
- Application process breakdown
- Start with flat, easy panels to build confidence
- Work in small sections, using heat to conform vinyl to curves
- Use overlapping techniques for complex areas
- Take breaks to avoid fatigue-induced mistakes
- Post-application care
- Allow the wrap to settle for 12-24 hours before exposing to elements
- Avoid washing for the first week
- Inspect for any lifting or bubbles that need addressing
- Apply any finishing touches or edge sealing
Common Pitfalls and How to Avoid Them
Even experienced wrappers encounter challenges. Here are some common issues and solutions to keep in mind during your DIY car wrap project:
Air bubbles and wrinkles
- Cause: Improper application technique or trapped air
- Solution: Use a pin to release air and reheat reapply the vinyl. For wrinkles, carefully lift the section and reapply with proper tension.
Misalignment and overstretching
- Cause: Poor planning or excessive force during application
- Solution: Remove and reapply the section, being mindful of alignment and tension. Take frequent steps back to check overall alignment.
Improper trimming
- Cause: Rushing or using dull blades
- Solution: Use fresh blades and take your time, especially around edges and trim. Practice on scrap vinyl before cutting on the car.
Dealing with complex areas
- Cause: Lack of experience with difficult contours
- Solution: Practice on spare parts or consider professional help for these areas. Use heat judiciously to help vinyl conform to complex shapes.
Visible seams
- Cause: Poor planning of panel overlaps
- Solution: Plan seam locations in less noticeable areas and use techniques like overlapping and tucking to minimize visibility.
Pros of DIY Car Wrapping
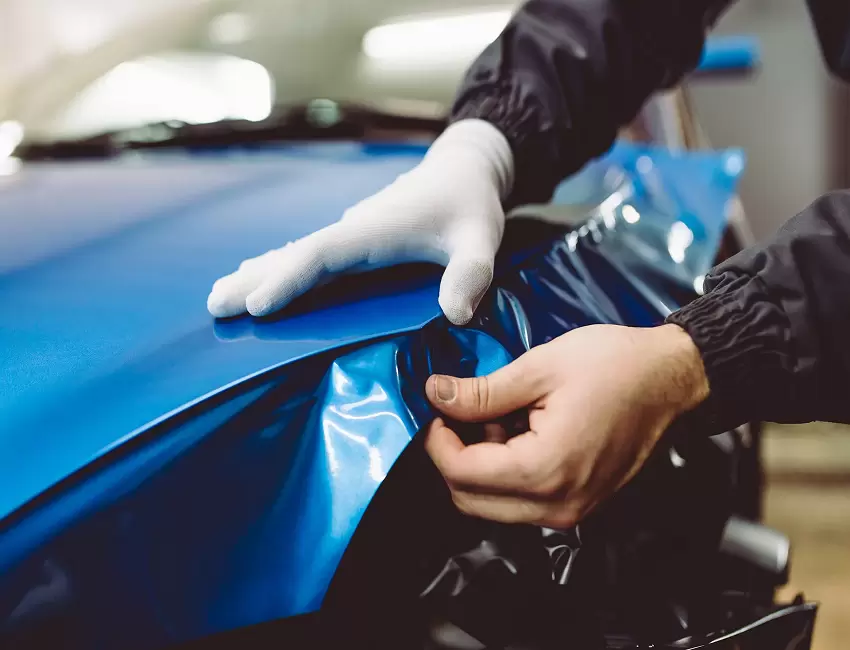
Despite the challenges, there are compelling reasons to attempt a DIY car wrap:
- Cost savings: Significantly cheaper than professional services, allowing for more frequent style changes.
- Customization freedom: Complete control over design and finish with the ability to mix and match styles.
- Skill development: Learn a valuable and marketable skill that can be applied to future projects.
- Potential for future projects: Apply your knowledge to other vehicles, furniture, or even small business opportunities.
- Sense of accomplishment: The satisfaction of transforming your vehicle with your own hands is unmatched.
- Reversibility: Unlike paint, wraps can be removed to restore the original look or try a new style.
When to Consider Professional Help
Sometimes, it’s best to leave it to the experts. Consider professional wrapping if:
- You’re attempting a full-body wrap as a beginner
- You own an exotic or extremely valuable car
- You’re under time constraints
- Warranty concerns are a priority
- You’re dealing with a particularly complex design or color-shift material
- The vehicle has significant damage that needs addressing before wrapping
Tools and Resources for the DIY Wrapper
To set yourself up for success, ensure you have the right tools and resources at your disposal:
Essential tool list:
- Heat gun (with temperature control)
- Squeegees (various types for different applications)
- Cutting tools (snap-off knife, precision knife, olfa knife)
- Infrared thermometer
- Microfiber cloths
- Isopropyl alcohol
- Masking tape
- Vinyl application gloves
- Magnets for holding vinyl in place
- Trim removal tools
Recommended vinyl brands:
- 3M: Known for quality and wide color range
- Avery Dennison: Excellent for beginners due to repositionable adhesive
- ORACAL: Great budget-friendly option
- VViViD: Offers unique finishes and good value
Helpful online resources:
- YouTube tutorials from professional wrappers
- Car wrapping forums and communities (e.g., VinylWraps.com forum)
- Manufacturer installation guides and videos
- Social media groups dedicated to car wrapping
Practice techniques:
Before tackling your car, practice on:
- Spare body panels (if available)
- Appliances (refrigerators, washing machines)
- Flat surfaces like tables or doors
- 3D objects with curves (like helmets or small toys)
Maintaining Your DIY Wrap
Proper maintenance can extend the life of your wrap significantly:
Cleaning best practices:
- Use pH-neutral car wash soap designed for vinyl wraps
- Avoid automated car washes with brushes
- Hand wash with microfiber mitts, working from top to bottom
- Rinse thoroughly to avoid soap residue
- Dry with a microfiber towel or air blower
Protecting from environmental damage:
- Park in covered areas when possible to minimize sun exposure
- Remove tree sap and bird droppings promptly to prevent staining
- Apply a vinyl-safe sealant for added protection against UV rays and contaminants
- Consider using a car cover for long-term storage
Addressing small repairs:
- Keep leftover vinyl for patch repairs on damaged areas
- Use a heat gun to reseal lifting edges
- Consider professional help for large damages or full panel replacements
- Learn to identify when a section needs replacing versus when it can be repaired
Expected lifespan of a DIY wrap:
With proper care, a DIY wrap can last 3-5 years, though this may be shorter than a professional installation. Factors affecting lifespan include:
- Quality of materials used
- Skill level of application
- Environmental conditions
- Maintenance routine
Legal Considerations
Before wrapping your car, be aware of these legal aspects:
- Color change reporting: Some jurisdictions require reporting significant color changes to vehicles. Check with your local DMV.
- Reflective material restrictions: Many areas prohibit overly reflective wraps for safety reasons. Stick to non-reflective finishes for public roads.
- Insurance implications: Inform your insurance company of any significant alterations to your vehicle. Some policies may be affected by custom wraps.
- Commercial use: If wrapping a vehicle for business purposes, ensure compliance with local advertising regulations.
Case Study: John’s DIY Wrap Journey
John, a car enthusiast from California, decided to wrap his 2015 Honda Civic in a matte blue vinyl. Here’s a breakdown of his experience:
- Preparation time: 2 days (research, gathering materials, cleaning car)
- Application time: 5 days (working evenings after his day job)
- Total cost: $800 (including tools and materials)
- Challenges faced:
- Bubbles in complex curve areas
- Misalignment on door panels requiring re-do
- Slight overstretching on hood leading to texture issues
- Final result: Satisfactory, with minor imperfections only noticeable up close
- Lessons learned:
- Importance of patience and taking breaks
- Value of proper surface preparation
- Need for better planning on panel alignment
John’s experience highlights the realistic challenges and outcomes of a DIY wrap project.
Frequently Asked Questions
Q: How long does a DIY wrap typically last?
A: With proper care, a DIY wrap can last 3-5 years, though environmental factors and application quality play significant roles. Professional wraps may last 5-7 years.
Q: Can I wrap over existing damage?
A: It’s not recommended. Existing damage can show through the wrap and may worsen over time. Repair damage before wrapping for best results.
Q: Is it possible to remove the wrap without damaging the paint?
A: Yes, when done correctly. Use heat to loosen the adhesive and peel slowly at a 45-degree angle. Professional removal is recommended for full peace of mind.
Q: What’s the learning curve for DIY wrapping?
A: Steep for beginners. Expect your first wrap to take significantly longer and potentially have imperfections. Skills improve with practice, but mastering techniques can take multiple projects.
Q: Can I wrap my car in sections over time?
A: While possible, it’s not ideal. Color matching can be challenging, and seams may be more noticeable. It’s best to wrap the entire vehicle at once for a cohesive look.
Conclusion: Is DIY Car Wrapping Right for You?
Wrapping a car yourself is undoubtedly challenging, but not impossible. It requires patience, attention to detail, and a willingness to learn from mistakes. For those with the time and dedication, DIY vehicle wrapping can be a rewarding experience that transforms your car’s appearance while saving money.
However, it’s crucial to honestly assess your skills, time, and the value of your vehicle. For many, the complexity and potential for costly errors make professional installation a more prudent choice. Consider starting with smaller projects, like wrapping interior trim pieces or a motorcycle helmet, to build your skills before tackling a full car.
Ultimately, whether you choose the DIY route or opt for professional help, car wrapping offers an exciting way to refresh your vehicle’s look and protect its original paint. With the knowledge gained from this guide, you’re now better equipped to make an informed decision about tackling this challenging but rewarding project.
Remember, the key to a successful DIY wrap lies in thorough preparation, patience and a willingness to learn. Don’t be discouraged by initial setbacks even professional wrappers started somewhere. With practice and persistence, you can achieve impressive results and enjoy the unique satisfaction of having transformed your vehicle with your own hands.

With over 5 years of dedicated experience in the automotive industry, I am passionate about all things automotive. My journey began with a deep curiosity for automobiles, which led me to delve deeper into their mechanics, technology and trends. My expertise spans various aspects of the automotive world, from the latest electric vehicles to classic car restoration techniques. Through my articles, I aim to share my knowledge and insights, helping readers stay informed and inspired in the fast-paced world of the automobile.
