Have you ever considered giving your van a makeover? Vinyl wrapping has become the go-to solution for many van owners looking to refresh their vehicle’s appearance or boost their business visibility.
But how much does it really cost to vinyl wrap a van? Let’s dive into the world of van wraps and uncover the factors that influence vinyl wrapping costs.
The Van Vinyl Revolution
Vinyl wraps have taken the automotive world by storm and vans are no exception. This trend has exploded in popularity for good reason.
A vinyl wrap can completely transform your van’s look without the permanence and expense of a new paint job.
Benefits of vinyl wrapping vs. painting:
- Cost-effective (often 50-70% cheaper than a quality paint job)
- Protects the original paint
- Easily removable
- Endless design possibilities
- Quicker installation time
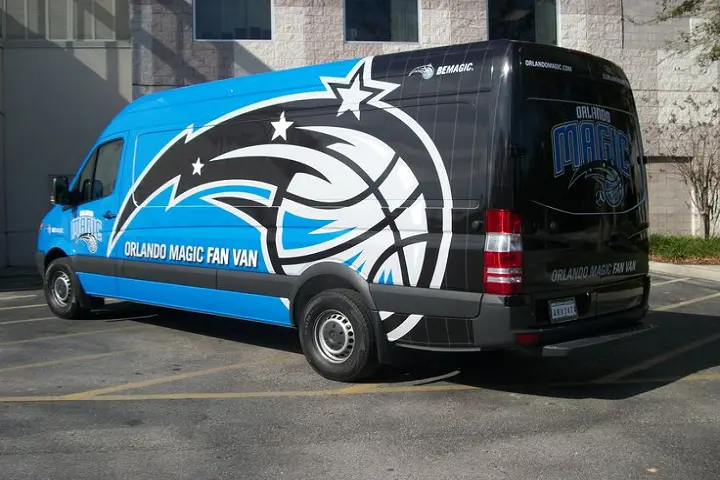
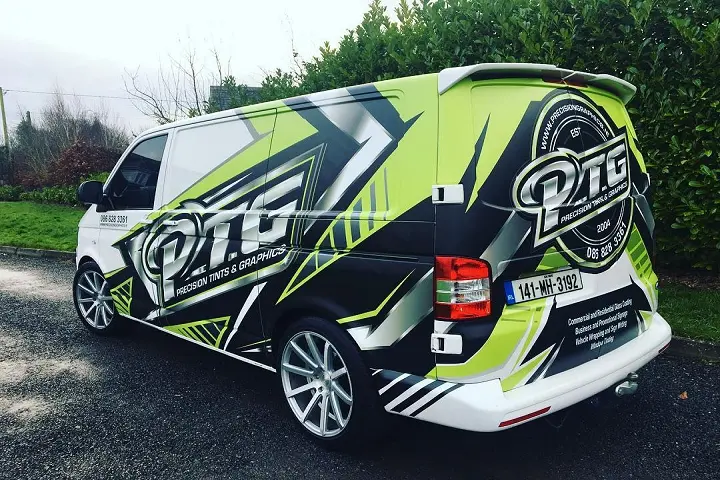
Whether you’re a business owner looking to turn your van into a mobile billboard or an adventure enthusiast wanting to personalize your camper, vinyl wrapping offers a flexible and affordable solution.
The versatility of vinyl wraps allows for creative expression that goes beyond what traditional paint can achieve.
Breaking Down the Costs: What’s Behind the Price Tag?
When it comes to the cost of vinyl wrapping a van, there’s no one-size-fits-all answer. Several factors come into play, each influencing the final price. Let’s break them down:
Van Size and Shape
The larger your van, the more vinyl you’ll need, which directly impacts the cost. Here’s a rough guide to van sizes and their vinyl requirements:
| Van Type | Approximate Square Footage |
| Compact (e.g., Ford Transit Connect) | 250-300 sq ft |
| Full-size Cargo (e.g., Mercedes Sprinter) | 450-550 sq ft |
| Passenger Van (e.g., Dodge Grand Caravan) | 350-450 sq ft |
| Camper Van Conversion | 500-600 sq ft |
Remember, these are estimates. Complex curves and angles can increase the amount of vinyl needed. The shape of your van also plays a crucial role.
Boxy vans with flat surfaces are generally easier to wrap, while those with intricate curves and indentations may require more material and labor.
Wrap Complexity: Vinyl Wrap A Van
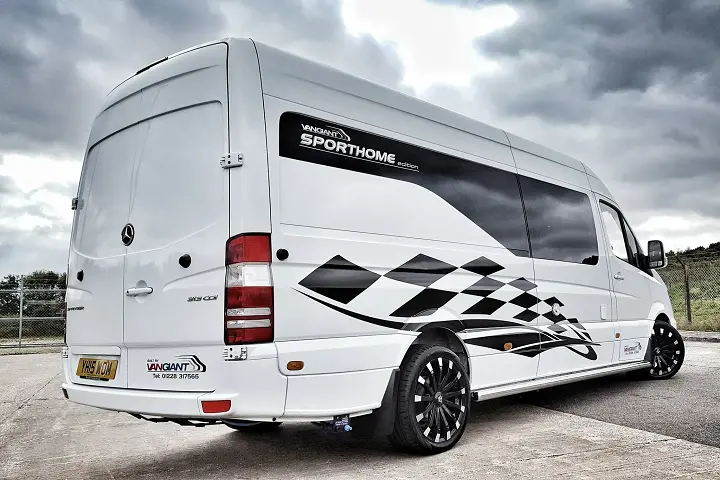
The extent of your wrap plays a significant role in determining cost. You have two main options:
- Full wrap: Covers the entire van, offering maximum impact and protection.
- Partial wrap: Covers specific areas, balancing cost with visual appeal.
A full wrap will naturally cost more due to increased material and labor requirements. However, it provides a more cohesive look and better protection for your van’s original paint.
Partial wraps can be an excellent option for those on a tighter budget or looking to highlight specific areas of their van.
Surface Preparation Requirements
The condition of your van’s exterior can affect the vinyl wrapping cost. Dents, rust or chipping paint may need to be addressed before wrapping. This prep work ensures a smooth application and longevity of the wrap.
Pro tip: Keep your van in good condition to minimize prep costs when it’s time to wrap. Regular washing and waxing can go a long way in maintaining a smooth surface for future wrapping.
Design Intricacy
The complexity of your chosen design can significantly impact the cost. Simple, single-color wraps are more affordable, while intricate designs with multiple colors or custom graphics will increase the price. Consider the following design elements and their impact on cost:
- Number of colors used
- Inclusion of gradients or fades
- Custom graphics or photographs
- Text and logo placement
- Special effects (e.g., textures, metallic finishes)
Installation Location and Labor Rates
Labor costs vary depending on your location and the expertise of the installer. Urban areas typically have higher rates, but they may also offer more experienced professionals. When choosing an installer, consider:
- Years of experience
- Portfolio of completed projects
- Customer reviews and testimonials
- Certifications or partnerships with vinyl manufacturers
Don’t forget to factor in travel costs if you’re considering an installer from outside your immediate area.
Vinyl Quality: You Get What You Pay For
When it comes to vinyl wraps, quality matters. The type of vinyl you choose affects not only the appearance but also the durability and longevity of your wrap. Let’s explore the options:
Budget-Friendly Options
Entry-level vinyl wraps are available for those on a tight budget. While they can provide a fresh look, they may not last as long or offer the same level of protection as higher-quality options.
Pros:
- Lower upfront cost
- Suitable for temporary applications
- Quick turnaround time
Cons:
- Shorter lifespan (1-3 years)
- Limited color and finish options
- May not conform well to complex curves
- Potential for shrinkage or lifting over time
Mid-Range Vinyl Choices
These wraps offer a good balance of quality and affordability. They’re suitable for most van owners who want a durable solution without breaking the bank.
Pros:
- Good durability (3-5 years)
- Wide range of colors and finishes
- Better conformability to van surfaces
- Improved UV resistance
Cons:
- May not offer the same longevity as premium options
- Limited warranties
- Slightly higher cost than budget options
Premium Wraps and Their Perks
Top-tier vinyl wraps come with a higher price tag but offer superior quality and longevity.
Pros:
- Extended lifespan (5-7 years or more)
- Exceptional durability and UV resistance
- Premium finishes (e.g., color-shifting, textured)
- Enhanced conformability for a paint-like finish
- Comprehensive warranties
- Better color retention over time
Cons:
- Higher initial investment
- May require professional installation for best results
Durability and Longevity Considerations
When choosing a vinyl wrap, consider how long you plan to keep it on your van. If you’re looking for a long-term solution, investing in a higher-quality wrap can be more cost-effective in the long run. Factors affecting durability include:
- UV exposure (consider your local climate)
- Frequency of washing and maintenance
- Storage conditions (garage vs. outdoor parking)
- Driving conditions (city vs. highway, off-road use)
Measuring Up: How Much Vinyl Does Your Van Need?
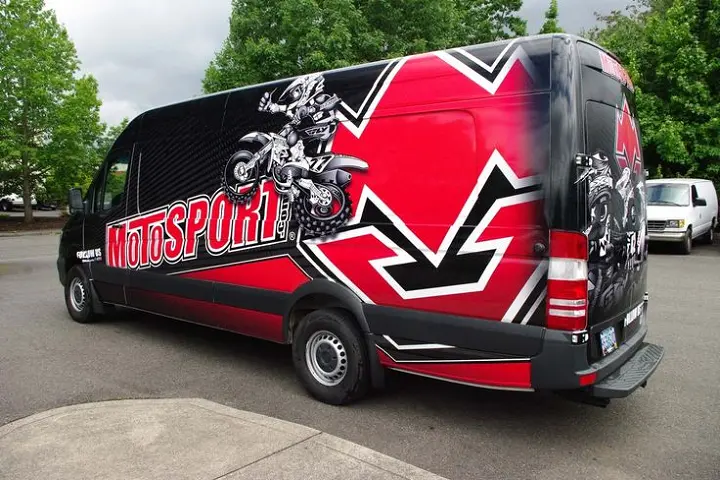
Accurately estimating the amount of vinyl needed is crucial for budgeting your van wrap project. Here’s how to approach it:
Common Van Sizes and Their Vinyl Requirements
We’ve touched on this earlier, but let’s dive deeper:
- Compact vans: These nimble vehicles typically require 250-300 square feet of vinyl for a full wrap. Examples include the Ford Transit Connect and Nissan NV200.
- Full-size cargo vans: Larger work vans need about 450-550 square feet. This category includes popular models like the Mercedes Sprinter, Ford Transit, and Ram ProMaster.
- Passenger vans: Family-friendly models usually fall in the 350-450 square foot range. Think Dodge Grand Caravan, Honda Odyssey, or Toyota Sienna.
- Camper van conversions: These often require the most vinyl, around 500-600 square feet, due to their boxy shape and additional features. This applies to DIY conversions as well as purpose-built models like the Winnebago Revel or Airstream Interstate.
Accounting for Windows, Doors, and Complex Curves
Don’t forget to factor in these elements:
- Windows: Decide whether you’ll wrap over them or cut around them. Perforated window vinyl is an option for rear and side windows.
- Doors: Include extra material for wrapping inside door jambs and handles.
- Curves and contours: Complex shapes require additional vinyl to ensure proper coverage without stretching or distortion.
- Mirrors and trim: These small areas can add up, so don’t overlook them in your calculations.
Waste Factor in Vinyl Calculations
Always add a 10-15% waste factor to your calculations. This accounts for:
- Trimming excess material
- Mistakes during installation
- Complex applications around curves and edges
- Potential reprints due to imperfections
Crunching the Numbers: Real-World Wrap Costs
Now, let’s talk dollars and cents. The cost of vinyl wrapping a van can vary widely, but here’s a breakdown to give you an idea:
DIY vs. Professional Installation Comparison
| Aspect | DIY | Professional |
| Material Cost | $500 – $2,000 | Included in total |
| Tools | $100 – $300 | Included |
| Labor | Your time | $500 – $2,500+ |
| Total Cost | $600 – $2,300+ | $1,500 – $5,000+ |
Price Ranges for Different Van Types
- Compact vans: $1,500 – $3,000
- Full-size cargo vans: $3,000 – $5,000
- Passenger vans: $2,500 – $4,000
- Camper van conversions: $3,500 – $6,000+
Remember, these are estimates. Custom designs or premium materials can increase costs significantly. Factors that can push you towards the higher end of these ranges include:
- Complex designs with multiple colors or gradients
- Premium vinyl materials (e.g., color-shifting or textured finishes)
- Extensive surface preparation requirements
- High-end installers with specialized expertise
Hidden Costs to Watch Out For
- Design fees: If you need a custom design created, this can add $200-$800+. Complex designs may cost even more.
- Removal of old graphics: $200-$500 depending on complexity and the condition of the underlying paint.
- Repairs or prep work: Varies based on your van’s condition. Dent removal, rust treatment, or paint touch-ups can add hundreds to your total.
- Rush fees: Expedited jobs often come with a premium, sometimes 20-30% more than standard rates.
- Travel fees: If you’re not near a major urban area, installers may charge for travel time and expenses.
- Post-installation touch-ups: Minor adjustments or repairs after the initial installation may incur additional costs.
Wrapping Materials: Choosing Your Van’s New Look
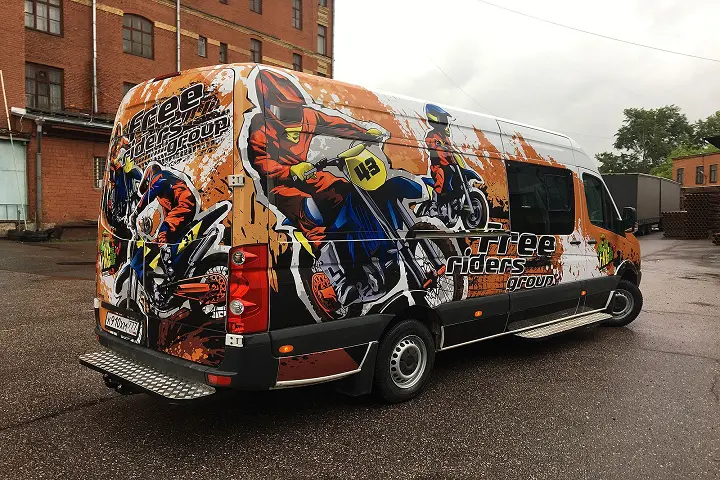
The type of vinyl you choose not only affects the cost but also the final appearance of your van. Let’s explore the options:
Cast vs. Calendered Vinyl: Pros and Cons
Cast Vinyl:
- Higher quality, more durable
- Conforms better to curves and contours
- Longer lifespan (5-7 years)
- More expensive
- Thinner and more pliable
- Less prone to shrinkage
Calendered Vinyl:
- More affordable
- Suitable for flat or slightly curved surfaces
- Shorter lifespan (1-5 years)
- May shrink or lift over time
- Thicker and less conformable
- Good for short-term applications or flat surfaces
Finishes That Turn Heads
- Glossy Glamour: Shiny and reflective, perfect for a sleek, professional look. Ideal for corporate fleets or luxury van conversions.
- Matte Mystique: Non-reflective finish for a modern, understated appearance. Popular among urban adventurers and stealth campers.
- Satin Subtlety: A happy medium between glossy and matte. Offers a sophisticated look without being too flashy.
- Metallic Magic: Eye-catching shimmer that stands out in any light. Great for promotional vehicles or show vans.
- Color-Shifting Chameleon: Changes color depending on the viewing angle. A showstopper for custom builds and brand activations.
- Textured Touches: Mimics carbon fiber, brushed metal, or even leather. Adds depth and interest to specific panels or the entire van.
Specialty Wraps for Unique Needs
- Reflective wraps: Enhance visibility and safety, especially for commercial vans operating at night or in low-light conditions.
- Insulating wraps: Help regulate interior temperature, ideal for camper vans or delivery vehicles transporting temperature-sensitive goods.
- Anti-graffiti wraps: Protect your van from vandalism with a clear coat that resists paint and allows for easy cleaning.
- Self-healing wraps: Feature a top layer that can repair minor scratches and swirl marks with the application of heat.
The Professional Touch: What You’re Paying For
Opting for professional installation? Here’s what your money buys:
- Expertise and experience: Skilled installers who know how to handle complex curves and avoid bubbles or wrinkles. They can navigate tricky areas like door handles, mirrors, and body seams with precision.
- High-end tools and controlled environments: Precision cutting tools and dust-free installation areas for a flawless finish. Climate-controlled workspaces ensure optimal conditions for vinyl application.
- Design services and mockups: Visualization of your wrap before installation. Many professional shops offer 3D rendering services to help you perfect your design.
- Warranties and guarantees: Peace of mind knowing your wrap is protected. Reputable installers often offer warranties covering defects in materials and workmanship.
- Time savings: What might take a DIYer several days or even weeks can be completed by professionals in a matter of days.
- Network of suppliers: Access to a wide range of vinyl options, including exclusive or hard-to-find materials.
- Problem-solving skills: Ability to address unexpected issues that may arise during installation, such as hidden damage or compatibility problems.
Case Study: Professional vs. DIY Installation
John, a camper van enthusiast, decided to wrap his Sprinter van himself to save money. After 60 hours of work spread over two weeks, he encountered issues with bubbles and misaligned panels.
Frustrated, he took it to a professional shop for correction. The shop had to remove the DIY wrap and start fresh, resulting in a total cost higher than if John had opted for professional installation from the start.
In contrast, Sarah hired a professional team to wrap her identical van. The job was completed in three days, with a flawless finish and a 5-year warranty. While the initial cost was higher, Sarah saved time and hassle, and her wrap looked professional from day one.
DIY Dilemma: Weighing the Pros and Cons
Thinking about tackling the vinyl wrap yourself? Consider these factors:
Pros:
- Significant cost savings on labor
- Sense of accomplishment
- Complete control over the process
- Flexibility to work at your own pace
- Intimate knowledge of your van’s surfaces
Cons:
- Time-consuming (can take 40+ hours for novices)
- Steep learning curve
- Risk of mistakes leading to wasted material
- Lack of warranty on installation
- Potential for inferior results compared to professional work
- Need to invest in specialized tools
Required tools for DIY vinyl wrapping:
- Heat gun
- Squeegee set
- Cutting tools (precision knives, blades)
- Microfiber cloths
- Isopropyl alcohol for surface prep
- Infrared thermometer to monitor surface temperature
- Vinyl magnet
- Air release tool
- Glove
Tips for DIY Success:
- Start with smaller, flatter panels to build confidence.
- Watch tutorial videos and practice on scrap material before tackling your van.
- Work in a clean, well-lit, and temperature-controlled environment.
- Have a friend assist with large panels to prevent stretching and misalignment.
- Take your time and be patient – rushing leads to mistakes.
Beyond the Wrap: Additional Customization Options
Want to mix things up? Consider these alternatives:
- Partial wraps and accents: Add visual interest without the full cost of a complete wrap. Popular options include roofs, hoods, or stripe kits.
- Cut vinyl graphics and lettering: Ideal for business branding or subtle personalization. Can be applied over existing paint or wraps.
- Paint protection films: Protect high-impact areas without changing your van’s appearance. Commonly applied to hoods, fenders, and mirror caps.
- Window tinting: Enhance privacy and reduce heat inside your van. Available in various shades and with added benefits like UV protection.
- Ceramic coating: While not a wrap, this liquid polymer can be applied over wraps or paint for added protection and shine.
Maintaining Your Investment: Care Tips for Wrapped Vans
To get the most out of your vinyl wrap, proper care is essential:
- Gentle cleaning: Use pH-neutral car wash soap and soft cloths.
- Avoid automated car washes: The brushes can damage the wrap.
- Promptly clean bird droppings and tree sap: These can stain if left too long.
- Park in shade when possible: Prolonged sun exposure can fade the wrap.
- Touch-ups: Address small damages quickly to prevent further issues.
The Business Angle: ROI for Commercial Van Wraps
For business owners, a van wrap is more than just a cosmetic upgrade it’s a mobile billboard. Consider these factors:
- Mobile advertising effectiveness: A wrapped vehicle can generate 30,000-70,000 impressions daily in urban areas.
- Tax considerations: Vehicle wraps may be tax-deductible as a business expense (consult your tax professional).
- Resale value impact: A well-maintained wrap can protect your van’s paint, potentially increasing resale value.
Frequently Asked Questions: Vinyl Wrap A Van
Q: How long does a vinyl wrap last?
A: Quality wraps can last 5-7 years with proper care. Budget options may need replacement after 1-3 years.
Q: Can you wrap over rust or damaged paint?
A: It’s not recommended. Rust should be addressed, and damaged paint repaired before wrapping for best results.
Q: Is it possible to remove a wrap without damaging the paint?
A: Yes, when done correctly by professionals. High-quality wraps are designed for clean removal.
Q: How does weather affect vinyl wraps?
A: Extreme temperatures can impact installation and longevity. Professional installers account for this in their process.
Q: Can you wrap a leased van?
A: Usually, yes. Most wraps can be removed without damage, but check your lease agreement first.
Conclusion: Wrapping Up the Vinyl Decision
Vinyl wrapping your van is an exciting way to transform its appearance, whether for personal style or business branding. By understanding the factors that influence vinyl wrapping costs from van size to material quality you can make an informed decision that balances your budget with your desired outcome.
Remember these key points:
- Quality matters: Investing in better materials can save money in the long run.
- Professional installation often yields the best results, especially for complex designs.
- Proper maintenance extends the life of your wrap, protecting your investment.
Whether you’re wrapping a compact van for weekend adventures or a fleet of cargo vans for your growing business, vinyl wraps offer a flexible, cost-effective solution to make your vehicle stand out on the road.
Ready to transform your van? Start by getting quotes from reputable vinyl wrap installers in your area, and don’t be afraid to ask questions about their process, materials and warranties. Your perfect van wrap awaits!

With over 5 years of dedicated experience in the automotive industry, I am passionate about all things automotive. My journey began with a deep curiosity for automobiles, which led me to delve deeper into their mechanics, technology and trends. My expertise spans various aspects of the automotive world, from the latest electric vehicles to classic car restoration techniques. Through my articles, I aim to share my knowledge and insights, helping readers stay informed and inspired in the fast-paced world of the automobile.
